Setting Up Payment Systems
Payment systems allow users to top up their balance on your website to purchase VIP statuses, skins, server privileges, and other products. Flute CMS supports a wide range of payment systems: bank cards, e-wallets, cryptocurrencies, and other popular payment methods.
How it works for users: a visitor to your site clicks “Top Up Balance”, selects a convenient payment method (e.g., a bank card), enters the amount, pays — and the funds are automatically credited to their balance. After that, they can spend the balance on products in your store.
If the payment system you need is not in the list of available ones, you can request its addition in our Discord .
Setting up payment systems requires admin.payment or admin.boss permissions.
Preparation for Setup
Requirements for Working with Payment Systems
Before starting the setup, make sure the following conditions are met:
Active Flute key — a valid Flute CMS access key is required to download payment system modules.
SSL certificate — most payment systems require a secure HTTPS connection for processing payments. Without SSL, payments will not work.
Configured currencies — the system must have currencies created that will be used for payments (e.g., dollars or the site’s internal currency).
Installing a Payment System Module
Each payment system in Flute CMS is implemented as a separate module. First, you need to install the module for the desired payment system, and then configure the connection to it.
Downloading Through the Marketplace
In the Admin Panel sidebar, click on the “Marketplace” icon. On the marketplace page, find the desired payment system in the list of available modules.
Make sure you have a valid Flute key installed for access to the module marketplace.
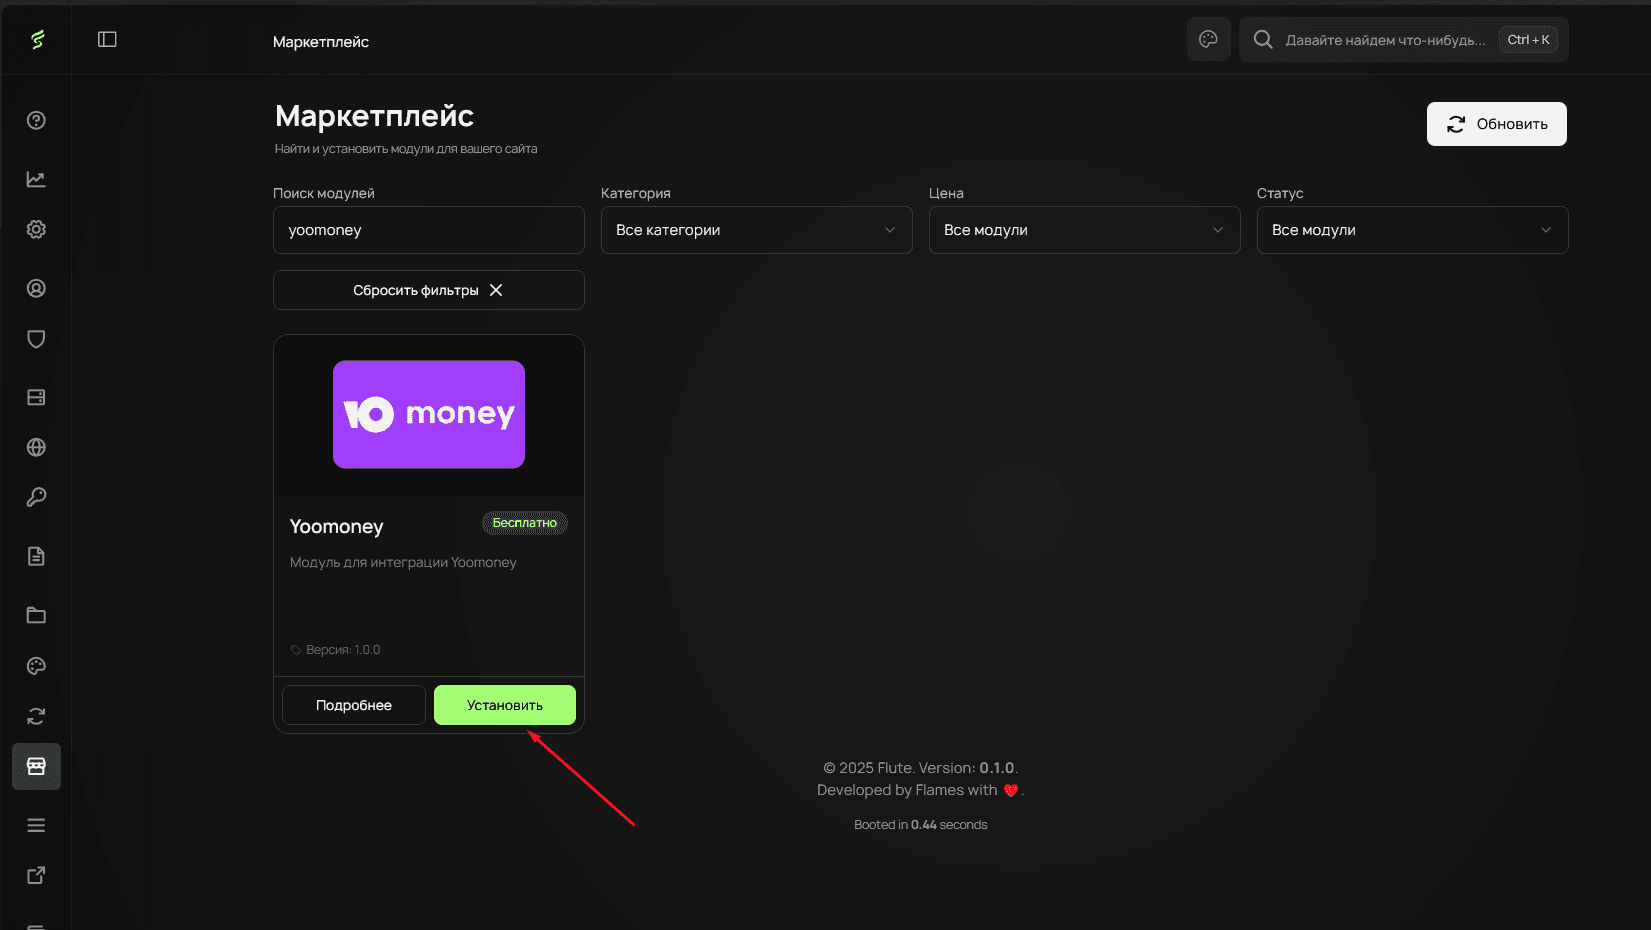
Click the “Install” button next to the selected payment system. The installation process will take a few seconds. After completion, the module will automatically appear in the list of available payment systems.
Manual Module Installation
If automatic installation is unavailable, the module can be installed manually:
- Download the module archive from the official source
- Go to the
Modulestab and drag the archive onto the page - Wait for the module to install and activate. If it doesn’t appear — refresh the module list.
Configuring the Payment Gateway
What is a Payment Gateway?
A payment gateway is a “bridge” between your website and the payment system (e.g., YooMoney or Robokassa). It is responsible for transmitting payment data: your site tells the gateway the amount and purpose of the payment, and the gateway redirects the user to the payment page and returns the result.
Creating a New Gateway
After installing the module, go to the “Payment Systems” section in the Admin Panel sidebar. Click the “Add” button to create a new payment gateway.
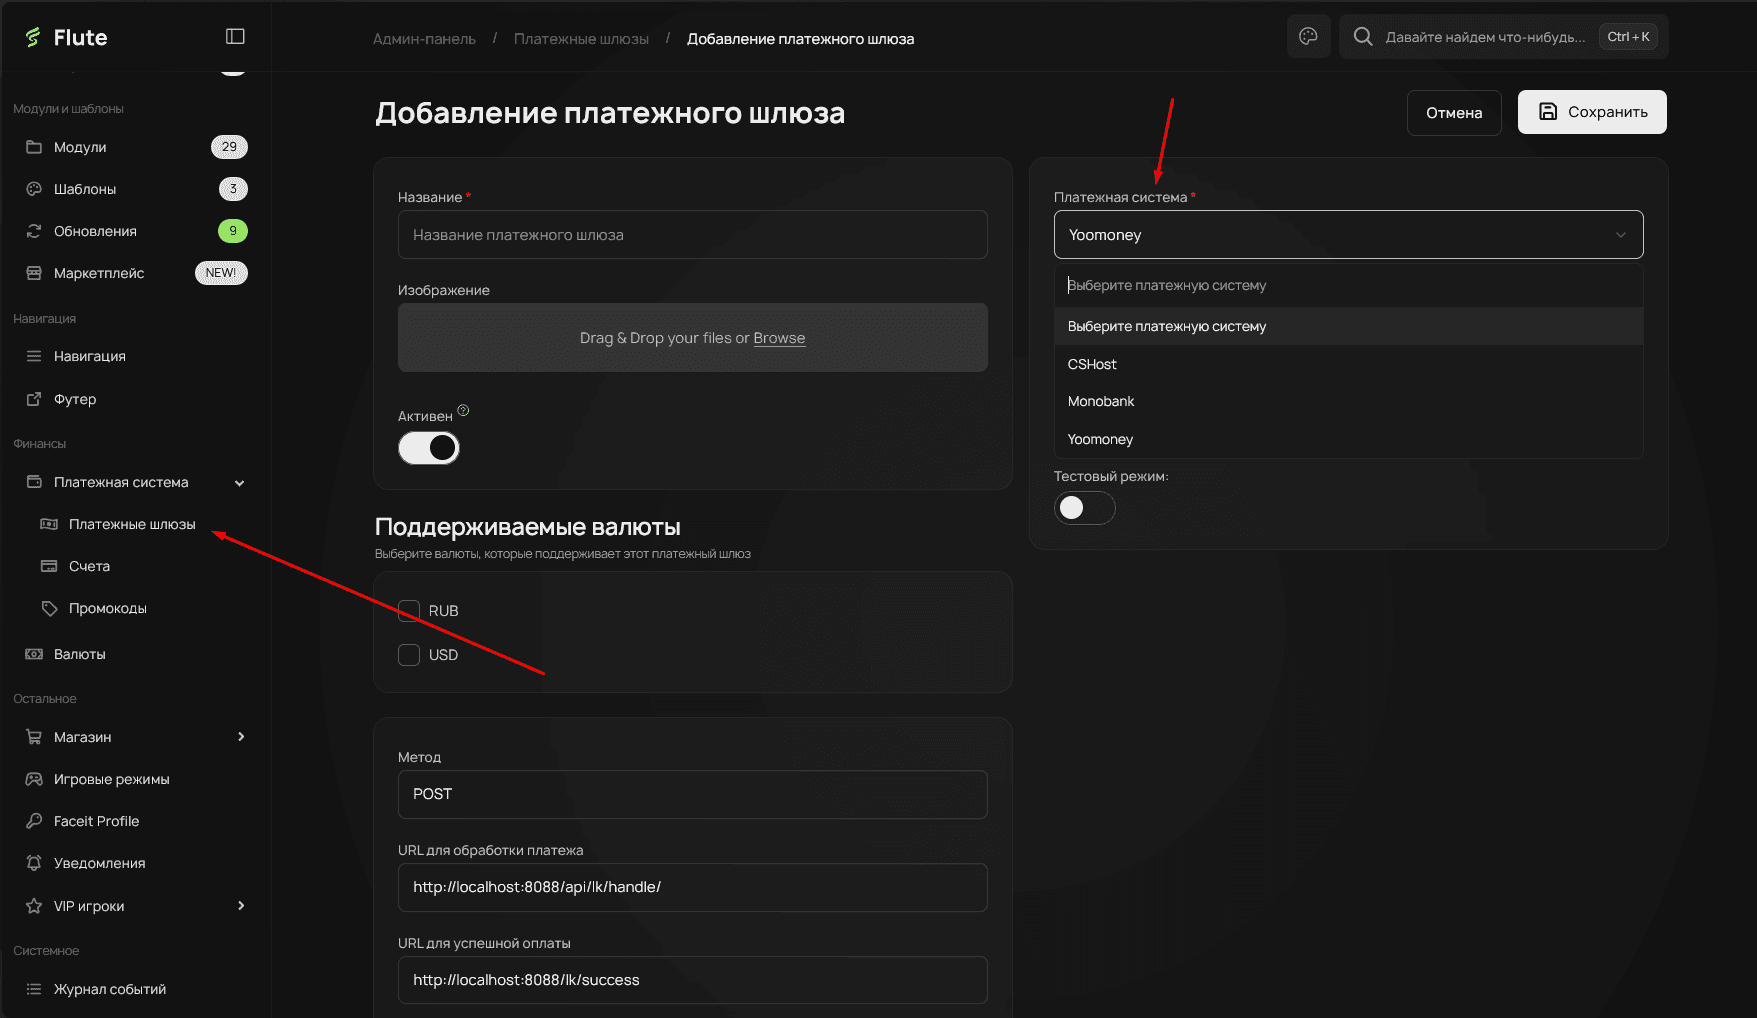
Configuring Connection Parameters
Each payment system requires unique connection parameters. Let’s look at the setup using YooMoney as an example:
Recipient identifier — the store identifier obtained when registering with YooMoney. (Wallet address)
Secret key — a secret key for verifying payment authenticity. This key is issued by the payment system and is used to confirm that requests come from it.
Test mode — enable for conducting test transactions without real charges. It is recommended to always test the system in test mode first.
Notification URL (webhook) — the address where the payment system will send notifications about payment status. Generated automatically.
What is a webhook (notification URL)? When a user makes a payment, the payment system needs to inform your site that the payment was successful. To do this, it sends a special request (webhook) to your site at the specified URL. This URL is generated automatically — you need to copy it and paste it into the settings of your checkout on the payment system’s side.
The exact parameters and their names depend on the selected payment system. Refer to the documentation of the specific provider for detailed information.
Configuring Currencies and Fees
Supported currencies — select the currencies in which the system will accept payments.
Minimum amount — specify the minimum payment amount for this system.
For the payment gateway to work correctly, you need to enable support for the corresponding currencies in the system settings.
Testing the Payment System
Conducting a Test Payment
After setup, be sure to test the payment system:
- Enable test mode in the gateway settings
- Create a test payment with the minimum amount
- Verify correct redirection to the payment page
- Confirm receipt of the payment status notification
- Check that funds are credited to the user’s balance
Troubleshooting Common Issues
Payments Are Not Going Through
Check settings — make sure all connection parameters are correct (store identifier, secret key).
Check SSL — many payment systems require a secure connection. Without HTTPS, payment notifications may not arrive.
Check the notification URL — the address must be accessible from the outside and respond correctly. Also, the “POST” notification method must be enabled in the checkout settings.
If you experience payment issues, refer to the documentation of the specific payment system or contact us on Discord .