Setting Up the Main Template
Flute CMS allows you to completely change the appearance of your website without any programming knowledge. You don’t need to write code — everything is done through a convenient visual editor right on the site pages. You can change the color scheme, add and move content blocks (widgets) by simply dragging and dropping with your mouse.
Access to all customization features requires administrator permissions: admin.pages or admin.boss
Changing the Site Color Scheme
How to Open the Color Editor
The color editing system works in real time. All your changes are saved automatically and applied to the entire site.
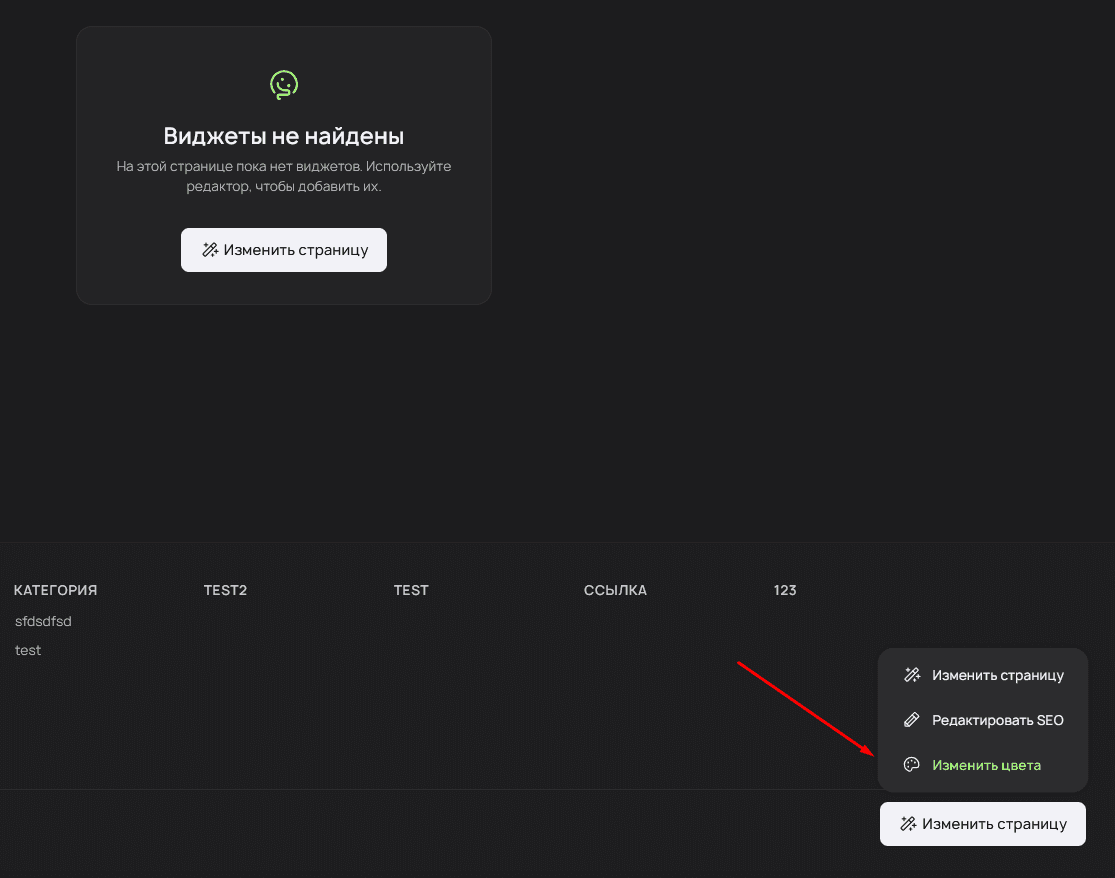
Navigate to any page of the site (excluding the Admin Panel). In the lower left corner of the screen, find the “Change Colors” button and click on it.
Working with the Color Palette
After opening the editor, a panel with available site colors will appear. Each color is represented by a separate button.
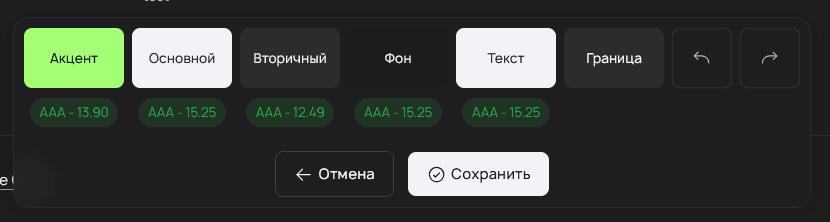
To change a color, click the corresponding button and select a new shade in the color picker that appears. Below each button, a contrast rating is displayed — this indicates how well the selected color pairs with other site elements. The higher the rating, the better the text readability on the selected background. A rating below 4.5 means the text may be difficult to read, especially for users with impaired vision.
The color scheme automatically adapts when switching between light and dark themes. You can customize colors in either theme.
Saving Changes
After completing the customization, click the “Save” button. The editor will automatically close, and the changes will be applied to the entire site.
If you change your mind, use the cancel button — all colors will revert to their original values.
Advanced users can edit colors manually through the file app/Themes/your_theme/colors.json. This file is created automatically when the color editor is first used.
Managing Page Widgets
What Are Widgets
Widgets are ready-made content blocks that can be placed on site pages. Think of them as Lego pieces — each widget performs its own function (text, image, statistics, form, etc.), and you simply assemble the page you need from them. The system allows you to add, remove, and configure widgets without any programming knowledge.
Launching the Widget Editor
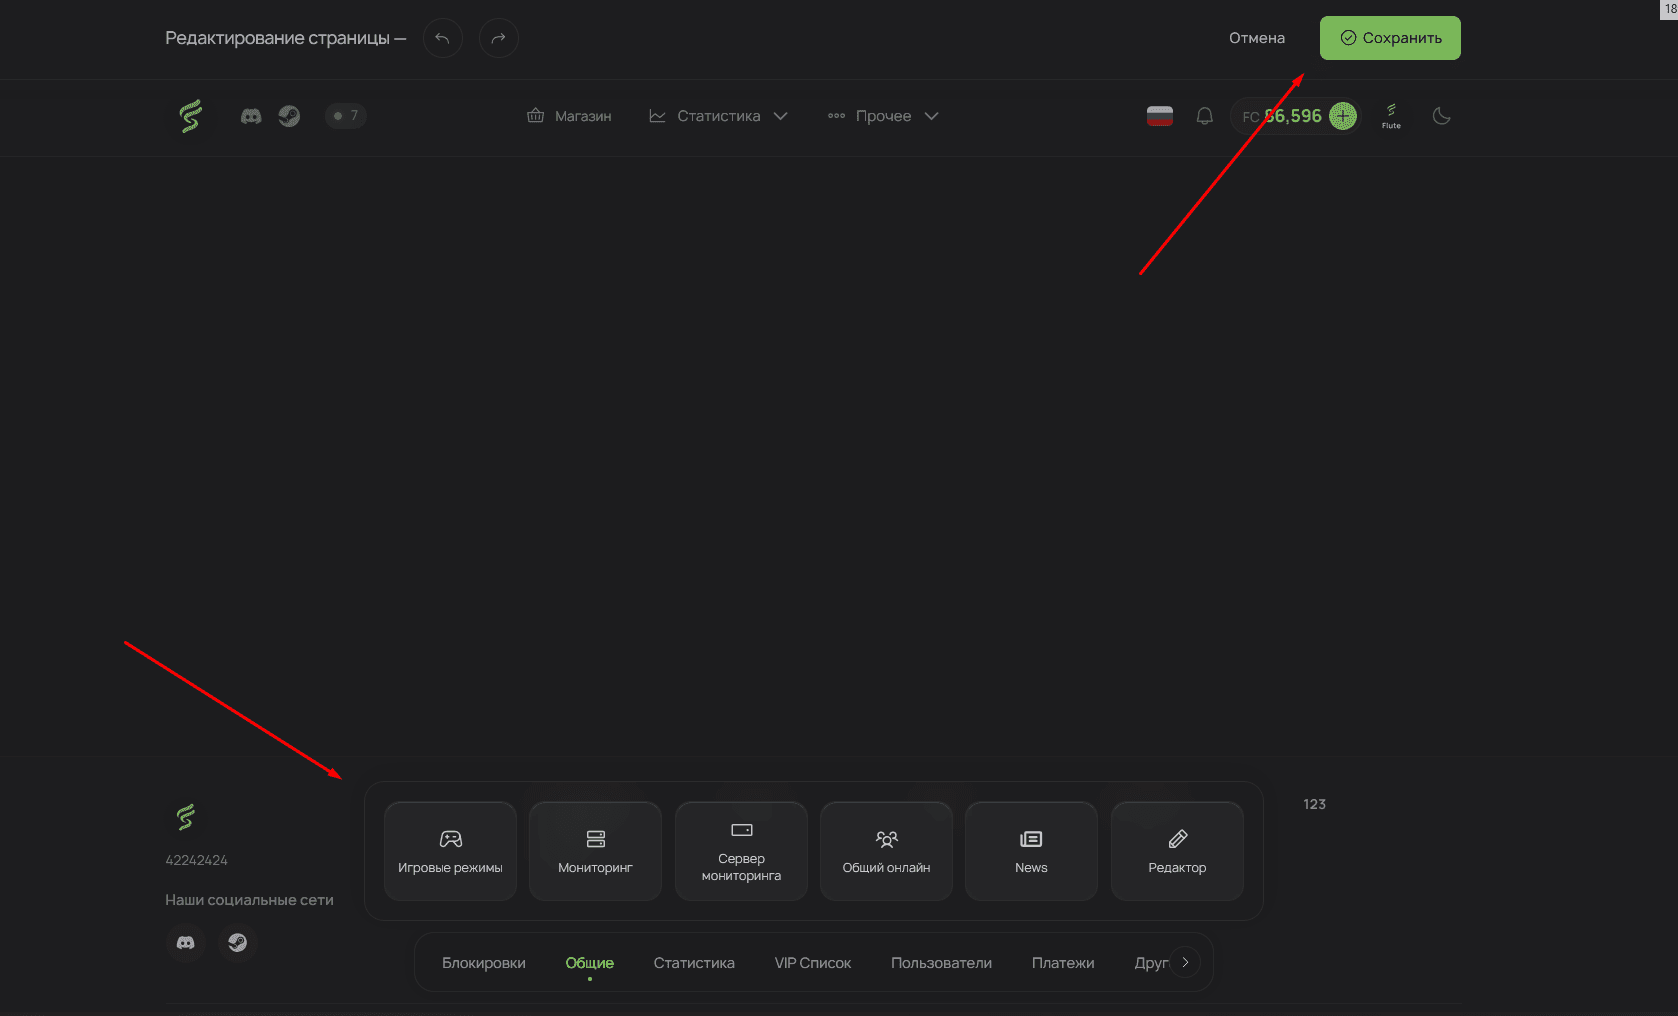
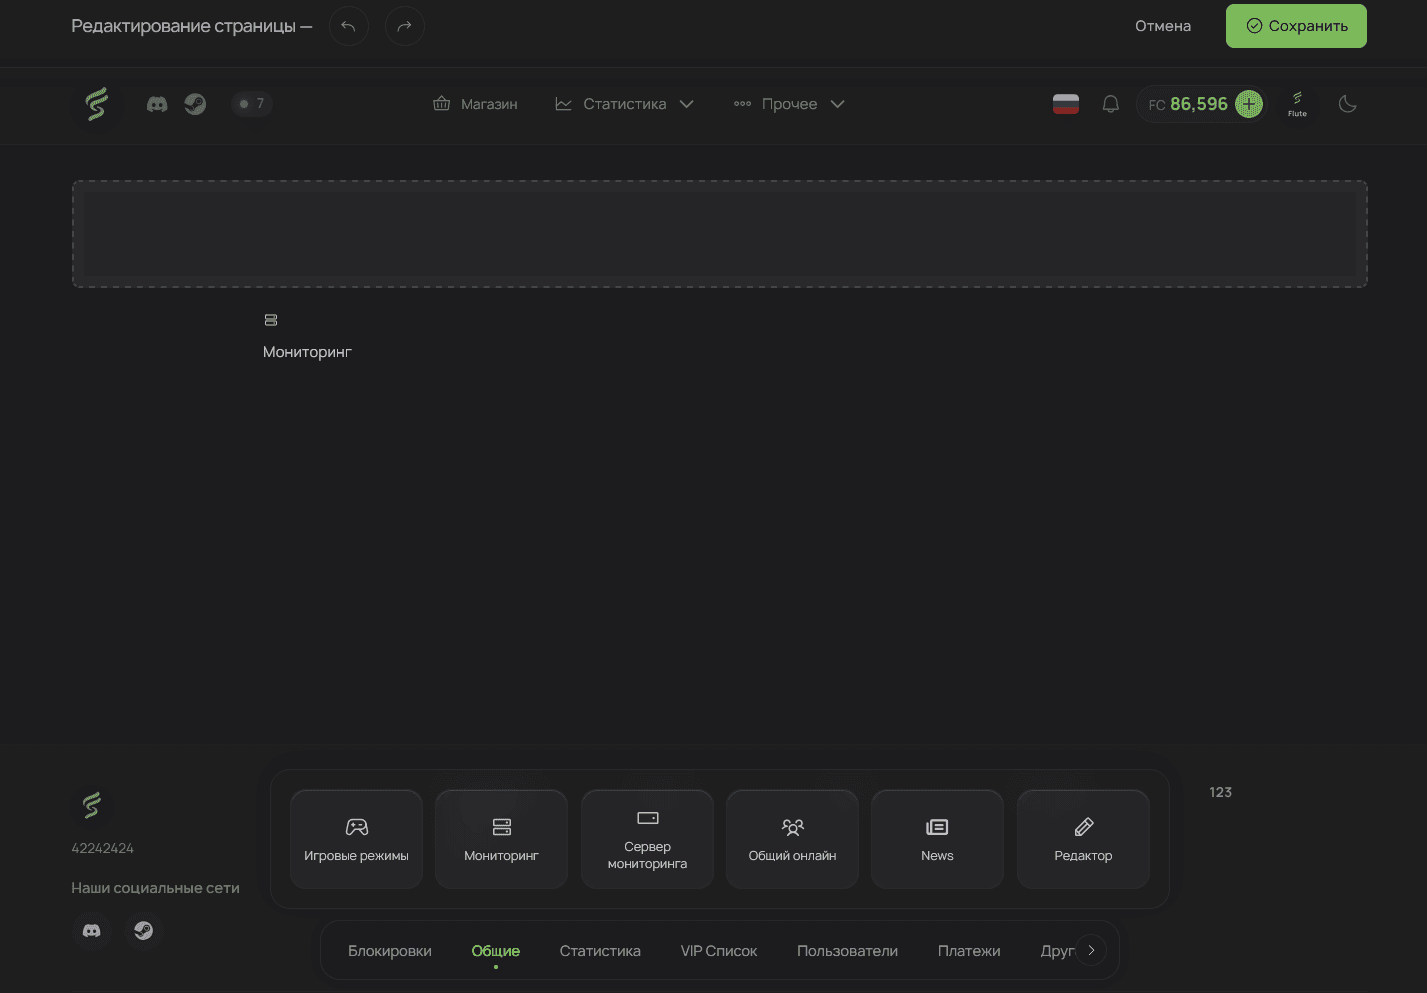
Navigate to the page you want to edit (except the Admin Panel). In the lower corner, find the “Edit Page” button and click on it.

After activating the editor, the interface will change: a panel with available widgets will appear at the bottom of the screen, and save or cancel buttons will appear at the top.
While editing a page, you cannot navigate to other sections of the site. Save or cancel your changes first.
If the page accidentally closes during editing, all unsaved changes will be automatically restored from the browser’s local storage the next time you open the editor.
Adding Widgets
To add a new widget to the page, find the desired element in the panel at the bottom of the screen. Hold the widget with the left mouse button and drag it to the desired location on the page.
After placing the widget, a control panel with three buttons will appear below it:
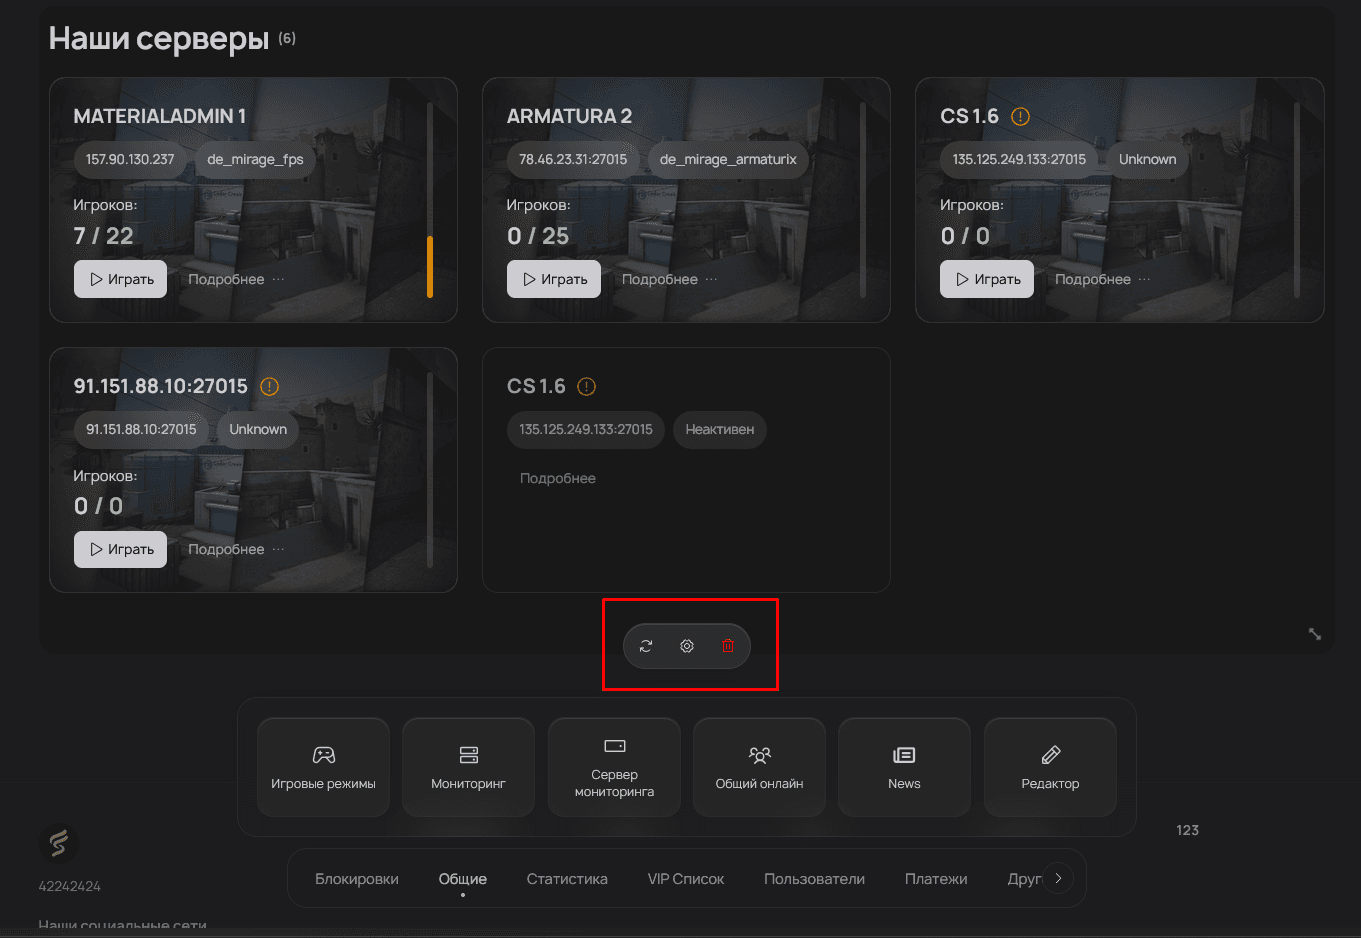
Reload — refreshes the widget content. Use this function if the widget is not displaying correctly.
Settings — opens the widget configuration window. Not available for all widget types.
Delete — completely removes the widget from the page.
Changing Position and Size
To move a widget, click on it with the left mouse button and drag it to a new location.
To resize, find the small icon in the lower right corner of the widget. Hold it and drag in the desired direction to enlarge or shrink the widget.
The widget editor works on all site pages. When activated, the existing page content is temporarily hidden and restored after saving changes.
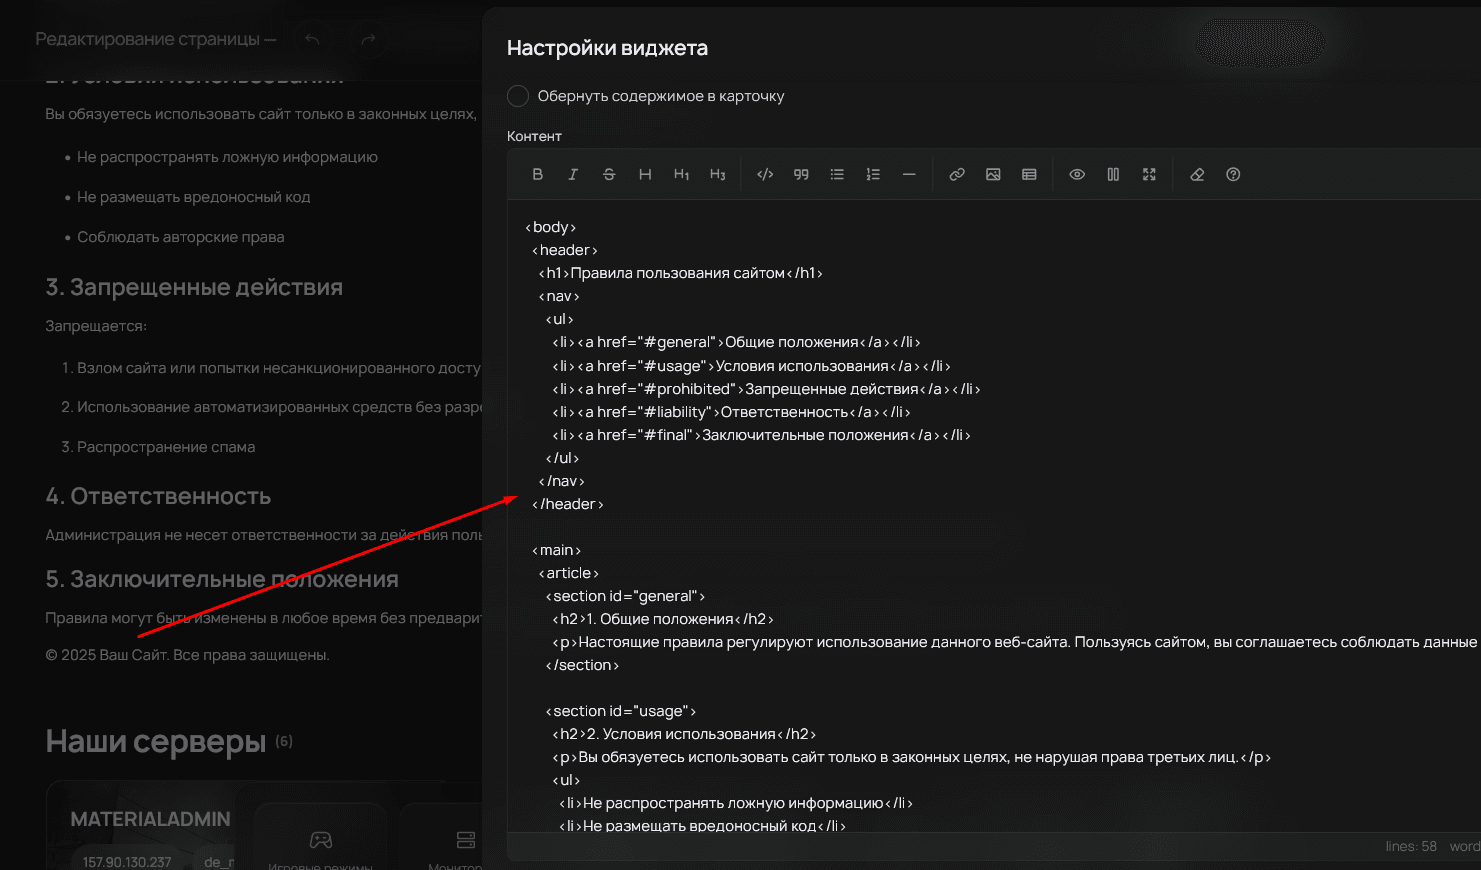
Text Editor Widget
Editor Features
Among the available widgets, the text editor holds a special place. It allows you to create custom content using simple Markdown syntax for text formatting.
The widget supports not only Markdown but also regular HTML code for creating more complex elements.
With this widget, you can add headings, paragraphs, lists, links, images, and other content elements.